Want beautiful nails in time for your D-day? Then your best bet is to seek a professional nail stylist. However, you can also actually give yourself a manicure at home. All you need is the right tools and the proper know-how. Here is a complete rundown on giving yourself a manicure right in the comforts of your home.
Things you will need
- Nail Polish Remover- Choose the acetone free varieties for removing older nail polish.
- Cotton balls-For wiping off the old polish and for placing between your fingers when applying the new polish.
- Cuticle Creams- A cuticle softening cream or any basic hand cream can loosen stubborn skin stuck to the nail bed. Alternatively, you can opt for cuticle oils containing jojoba oil, mineral oil etc to condition the cuticles.
- Emery board or nail files- Buy a couple of files with varying grains to smoothe and shorten the nails.
- Finger bowl- Containing some warm water to dip fingers into. This helps soften the skin and nails prior to filing.
- Hand lotion– To soften rough skin on palms and hands. Choose one with SPF for sun protection for your hands.
- Towels to dry your hands.
- Scissors and nippers- essential for trimming nails
- Clear base-coat nail polish– This provides foundation for the polish. This can also be used as top coat to protect the nail art.
Step-By-Step Manicure at home
- Remove the older nail polish coat. Change the cotton wool often after you first dip it in the remover and rub gently on the nails. The darker the earlier nail polish, the harder it would be to remove. Make sure you remove all traces of polish from the cuticle line and the free edge of the nails.
- Now use the coarse grain emery board or a nail file to shape the nail. Never saw back and forth as this can damage the nail plate leading to splitting and peeling. Shape the nails so that they acquire a round or a square-round edge.
- Now soak your hands in the warm water taken in the finger bowl. You can add a bit of a mild face cleanser to this water. Do this for a few minutes (1 to 3 minutes is ideal). This helps soften the cuticles.
- Now gently remove the calluses and cuticles around the nail making sure you apply some cuticle softening creams to ease the process. Do not apply excessive pressure that may rip, tear or cut into the cuticle.
- Now apply some cuticle oil or hand lotion onto your hands. Massage a bit all over to moisturize and give a spa like finish to the hands, nails as well as the cuticles.
- Prepare the nails for polish by applying a base coat. This prevents the main coat from chipping or peeling. Now you can apply the main colour in multiple coats making sure that each coat is dried before applying the next. Use cotton balls to touch up and correct mistakes if any. You can sit near/under a gentle cooling fan to dry the nails quickly, but never use a hair dryer for this job. This can actually crack and peel your nail polish.
Using False Nails
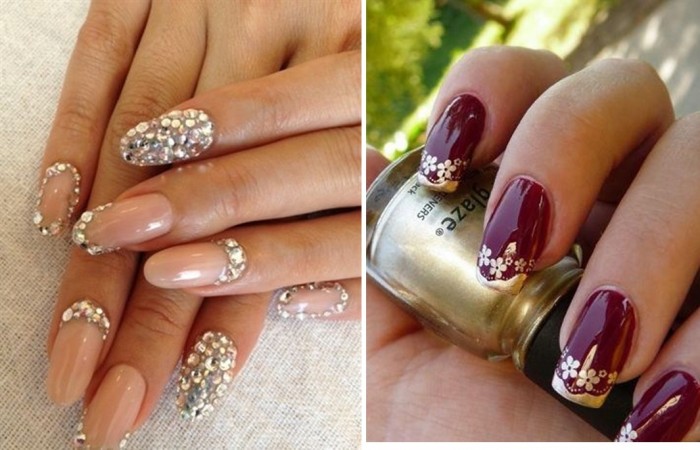
image via weddbook.com
If you aren’t too proud of your real nails, you could either consult a bridal nail specialist a few months prior to your wedding for ways of improving the nail health. (You can also talk to your doctor about taking vitamin supplements to make your nails stronger and ‘wedding-ready’). Alternatively, you could opt for false nails. Here are few options:
- Acrylic nails- these should not be used for very long periods as they can give rise to allergies, nail fungus, or even turn the nail bed green if not used properly.
- Acrylic tips- These cover just the tip of your nails and can be buffed and decorated to look a part of the natural nail.
- Gel nails- These also contain acrylics and they gradually harden to form solid and natural looking enhancement.
- Stick on nails- These come in form of pre-cut plastic nails in variable lengths and can be attached to the nails for DIY stylish nails.
We hope these manicure at home tips help you. For beautiful bridal nail art ideas, view these 30 amazing nail styles.
Featured image via: inkyournails.com